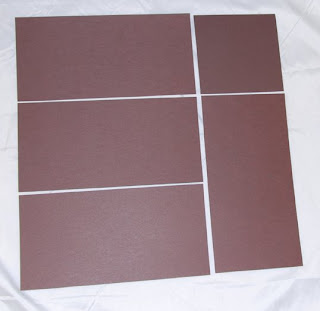
Supplies:


- paper cutter (I own the SU! Table Top Paper Cutter and there are a variety of options out there including the SU! Paper Cutter)
- Piece of cardstock 8 1/2" x 11" or 12" x 12" (will cover both sizes below)
- Scoring tool; basically something to score or fold the card in half (I own a Scor-It and SU! Bone Folder and vary depending on quantity of cards I am making; you can also use the SU! Paper Cutter with a scoring blade)
Cutting a standard A2 Card Base
The standard card size is called A2 and measures 4 1/4" x 5 1/2". It is made from 8 1/2" x 11" cardstock, preferably of a good weight like the SU! cardstock.

2. Slide blade down carefully to ensure that the paper does not move. The SU! Table Top Cutter has a guide that holds paper in place. (notice my hands holding the plastic guide down)
3. You are left with two pieces of paper measuring 5 1/2" x 8 1/2"
A2 cards can be orientated horizontally or vertically as shown here...

Cutting a Top-Fold A2 Card Base
The Top-Fold A2 card also measures 4 1/4" x 5 1/2" and is made from 8 1/2" x 11" cardstock.

2. Slide blade down
3. You are left with two pieces of paper measuring 11" x 4 1/4"
These images show how they look lying horizontally or vertically.

Cutting a 4x4 Square Card Base
The 4" x 4" card is most economically made from 12" x 12" cardstock.


2. Take the smaller piece and cut off 4" (lining up at 8") as shown to leave you a 8" x 4" piece
3. Cut the remaining larger piece at the 4" and 8" marks as shown


4. The scrap 4x4 piece is great used to punch shapes for use as embellishments on your cards so set it aside in a scrap paper pile

Scoring your cards
Method 1: Bone Folder
I believe this is the most accurate for a small amount of cards.
1. Line up your corners as per the following sizing and images
2. Smooth bone folder along the centre to crease the card into two equal halves

Card Size Score Point
Standard A2 4 1/4"
Top-Fold 5 1/2"
4 x 4 4"
Method 2: Scoring Blade
1. Place card into slide style cutter such as the SU! Paper Cutter (sorry I do not own at this point so no pictures)
2. Line up up cardstock at appropriate mark (see chart above) and gently slide scoring blade all the way down (ensure you are applying gentle pressure so that you do not cut through the cardstock)
Method 3: Score-It or other bulk scoring tool
1. Line up your cardstock piece at appropriate mark (see chart above)
2. Pull scoring tool along the centre to crease the card into two equal halves


When folding your cards, always fold towards the peak side (look carefully at the photos below):


I always go over the folded crease again with the bone folder for my personal cards, even if I have used the score it, but I am my own worst critic and it is not necessary :)
NOTE: Cardstock has a directional grain to it. Therefore it is stronger in one direction than the other. In general, a trick to knowing the best direction to fold cardstock is if you start like you are going to fold, the direction that is easiest and does not fight you is the best way to fold...
Optional: Create Card Front
1. Cut your card stock in the following sizesCard Size Score Point
Standard A2 4" x 5 1/4"
Top-Fold 4" x 5 1/4"
4 x 4 3 3/4" x 3 3/4"
 2. Decorate and attach card front to card base (This is the fun part!!!)
Good luck - really it is easy :) If you have any questions...
1 comment:
Very interesting and to think I have always tried folding by hand. Thank you for the great tips.
Post a Comment